


Congratulations on receiving your Caterpillar – Build a Painted Lady Butterfly Raising Kit! We are so glad you chose us to embark on this special journey with! For your help and guidance we have created the below information page that hosts the information you need to raise and release your butterflies with the utmost care based on our experience also including other helpful information. We understand that not everyone enjoys reading which is why we also have created a 10 minute instructional video along with the steps below. The video is suitable for children, and we strongly recommend that an adult review the written instructions and watch the video to fully understand the necessary steps in this journey and gain a better comprehension. On our website you can also find a FAQ page, more information and Blog Posts about related material. Further helpful information can also be directly found on the ordering page.
If you would like to order a Caterpillar – Build a Painted Lady Raising Kit click here. If you would like to see the steps with the detailed breakdown on how to order the kit please visit the blog post – How to order a Caterpillar – Build a Painted Lady Raising Kit. If you would like to check and see how we process your order once it has been placed visit the blog post What happens after I Order my Painted Lady Kit? (Tracking Shipping Information and More!
As recommended throughout our website and on the ordering page, etc. we strongly suggest selecting the fastest shipping method available that includes the guarantee of livestock. This is preferable to expedited shipping or other methods without the guarantee of livestock, as those typically result in longer shipping times and different handling by the courier service. Choosing Xpresspost or Priority Shipping with the guarantee of livestock included is highly recommended, as these options typically offer a shorter shipping duration and better package handling.
Prelude
1. Box and Setup
a. What is included in your package
b. Additional information on caterpillar packaging
c. Invoice and Packaging Slip / Submitting Invoice for Payment
d. Unboxing
e. Set up
2. Stages of Growth
a. Caterpillar stages of growth
b. Cleaning and Care
c. Steps to take during growth
3. Butterfly Pupation – Chrysalis
a. What to expect during pupation
b. What to do during pupation
4. Setting up the Net Cage
5. Transferring Pupa to the Net Cage
6. Hatching
7. Butterfly Feeding
8. Releasing
9. Emergency issues
a. What can go wrong & what to do
b. Claims Form
10. Helpful Links
11. Thank you and Contact Information
Raising a butterfly is a wonderful process! In the wild, only about 1 in 100 (or 1%) of butterfly eggs make it to becoming a butterfly. Raised in our environments, the success rate is much higher, even with our combined best efforts, not every caterpillar you have may make it to the point of becoming a butterfly. Due to natural circumstances, it is possible not all of your caterpillars will make it to becoming butterflies, or that they may be born with slight birth defects. This is something to be understood when ordering live insects and we share with you throughout our services to you. We take every precaution to ensure your insects are healthy and alive when packaged. However, despite our careful handling, external factors such as shipping conditions and other variables may occasionally impact your order. While this is uncommon, it is a possibility. The butterflies success rate increases when you follow the below instructions carefully. Please understand that birth defects and death may occur in this process, as it is only natural. As insects in the wild perish or are born with challenges for variables reason and understanding that the success is less than 1% by raising and releasing the beautiful insects through this raising kit you will learn about how delicate the life of a butterfly is and regardless of your age you will have something special to take away from this experience. We encourage you to read the blog post below at some point during the raising process, as it covers an important lesson related to life cycles, Embracing Imperfection: Life Lessons from Butterflies
A. What is included in your package
Every package is customized to your order and will vary based on your selections and quantity. If you purchased a Caterpillar – Build Painted Lady Butterfly Raising Kit, Depending on your selections and any optional add-ons, including minimum order quantities. your order may include:
B. Additional information on caterpillar packaging.
Please note that if you order 10 caterpillars and select the option of 5 caterpillars per cup, you will receive 2 cups, each containing 5 caterpillars, for a total of 10. Alternatively, if you order 25 caterpillars in cups of 5, you will receive 5 cups, each containing 5 caterpillars, for a total of 25. If you choose 10 caterpillars with 1 caterpillar per cup option, you will receive 10 cups, each containing 1 caterpillar. Similarly, if you order 25 caterpillars with 1 caterpillar per cup option, you will receive 25 cups, each containing 1 caterpillar. From time to time, you may receive extra caterpillars in each cup (only when available, though this is not guaranteed). Rest assured, the food and diet included in those cups will be adjusted to accommodate the extra caterpillar(s) accordingly. If and when also available you may receive other free content in your order which will be an addition and cause other variations.
C. Invoice and Packaging Slip / Submitting Invoice for Payment
To review the contents of your order and view the packaging slip, simply check the order invoice or email confirmation you received. The order invoice can also be downloaded on the checkout page once you have placed your order. Both the invoice that can be downloaded or is emailed to you is the same. This provides a breakdown of your order and serves as both your invoice and packaging slip when we prepare your shipment. It is only sent to you via email and can be accessed at any time for reference. Additionally, our fulfillment team can view the details of your order on a screen while packaging, as well as on the shipping label, which includes relevant coding for reference as to what is included in your package for fulfillment.
If you’re unable to find your invoice/packaging slip (which is the same document/email), please check your spam or junk mail folder, as it may have ended up there. The email may be sent from noreply@monarchbutterflies.ca or info@monarchbutterflies.ca, so please add both addresses to your contact list. If you’re still unable to locate the email, feel free to contact our team, and we’ll be happy to resend it. If you still don’t receive it, please provide an alternate email address, as some school or organization services may block emails based on their firewall settings. We recommend emailing our team to update your email address, and once we receive your request, a team member will acknowledge it and make the necessary update. You can then request any previous emails to be forwarded to you if needed.
Please also note that for your convenience, once your order is paid and submitted on our website, you can always download the invoice/packaging slip directly from the payment confirmation page. This is the only version of the invoice available that can be saved as a PDF and submitted to your payment provider for processing and reimbursement. Simply click “Print” and select “Save as PDF” to save the invoice and submit it accordingly.
D. Unboxing
E. Set up
A. Caterpillars stages of growth
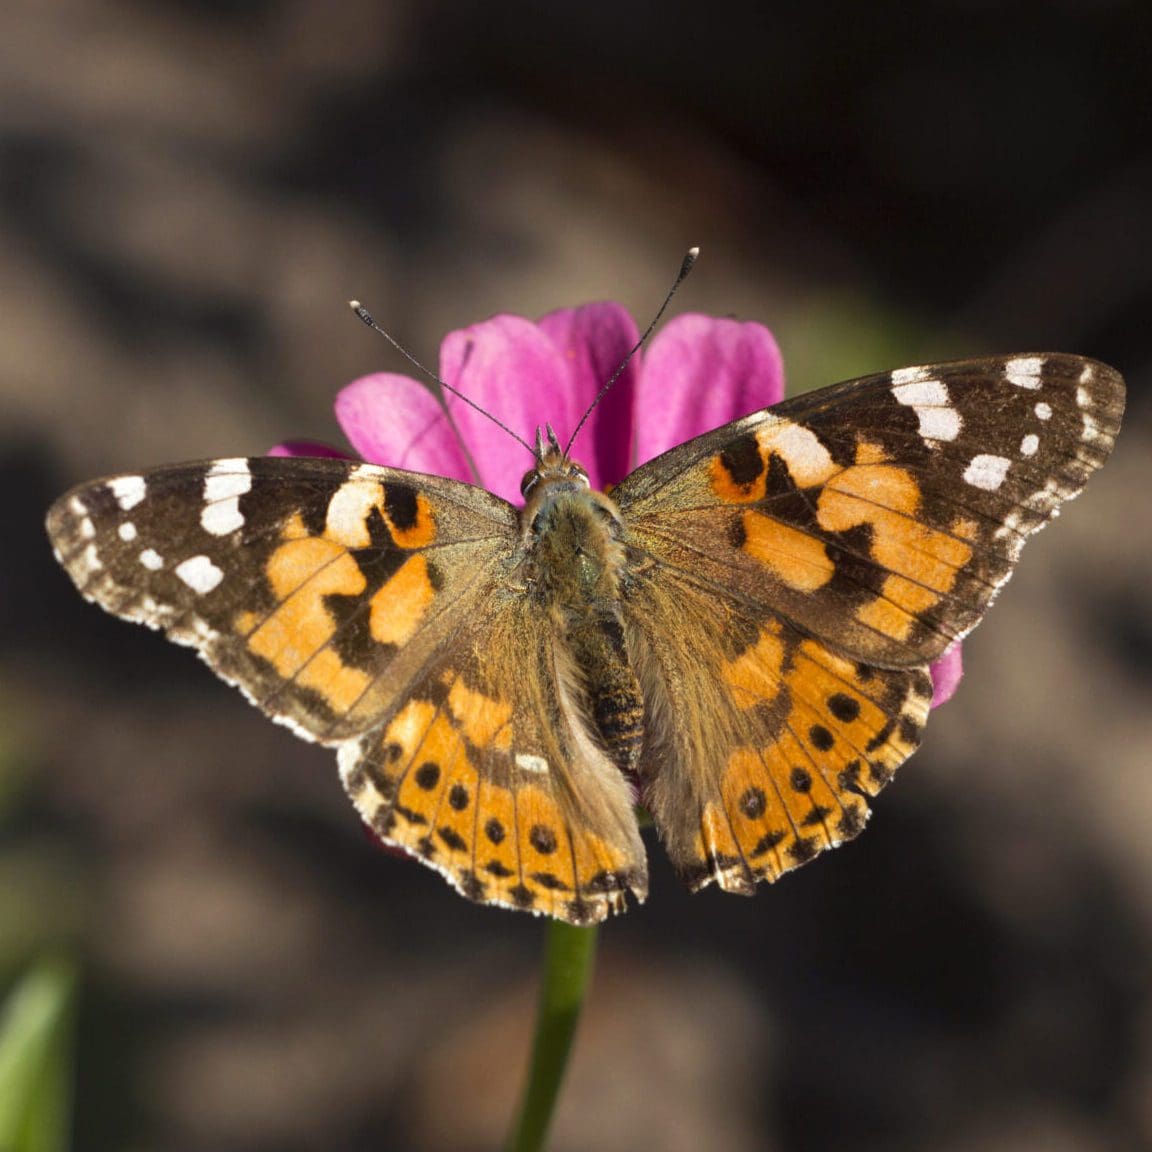
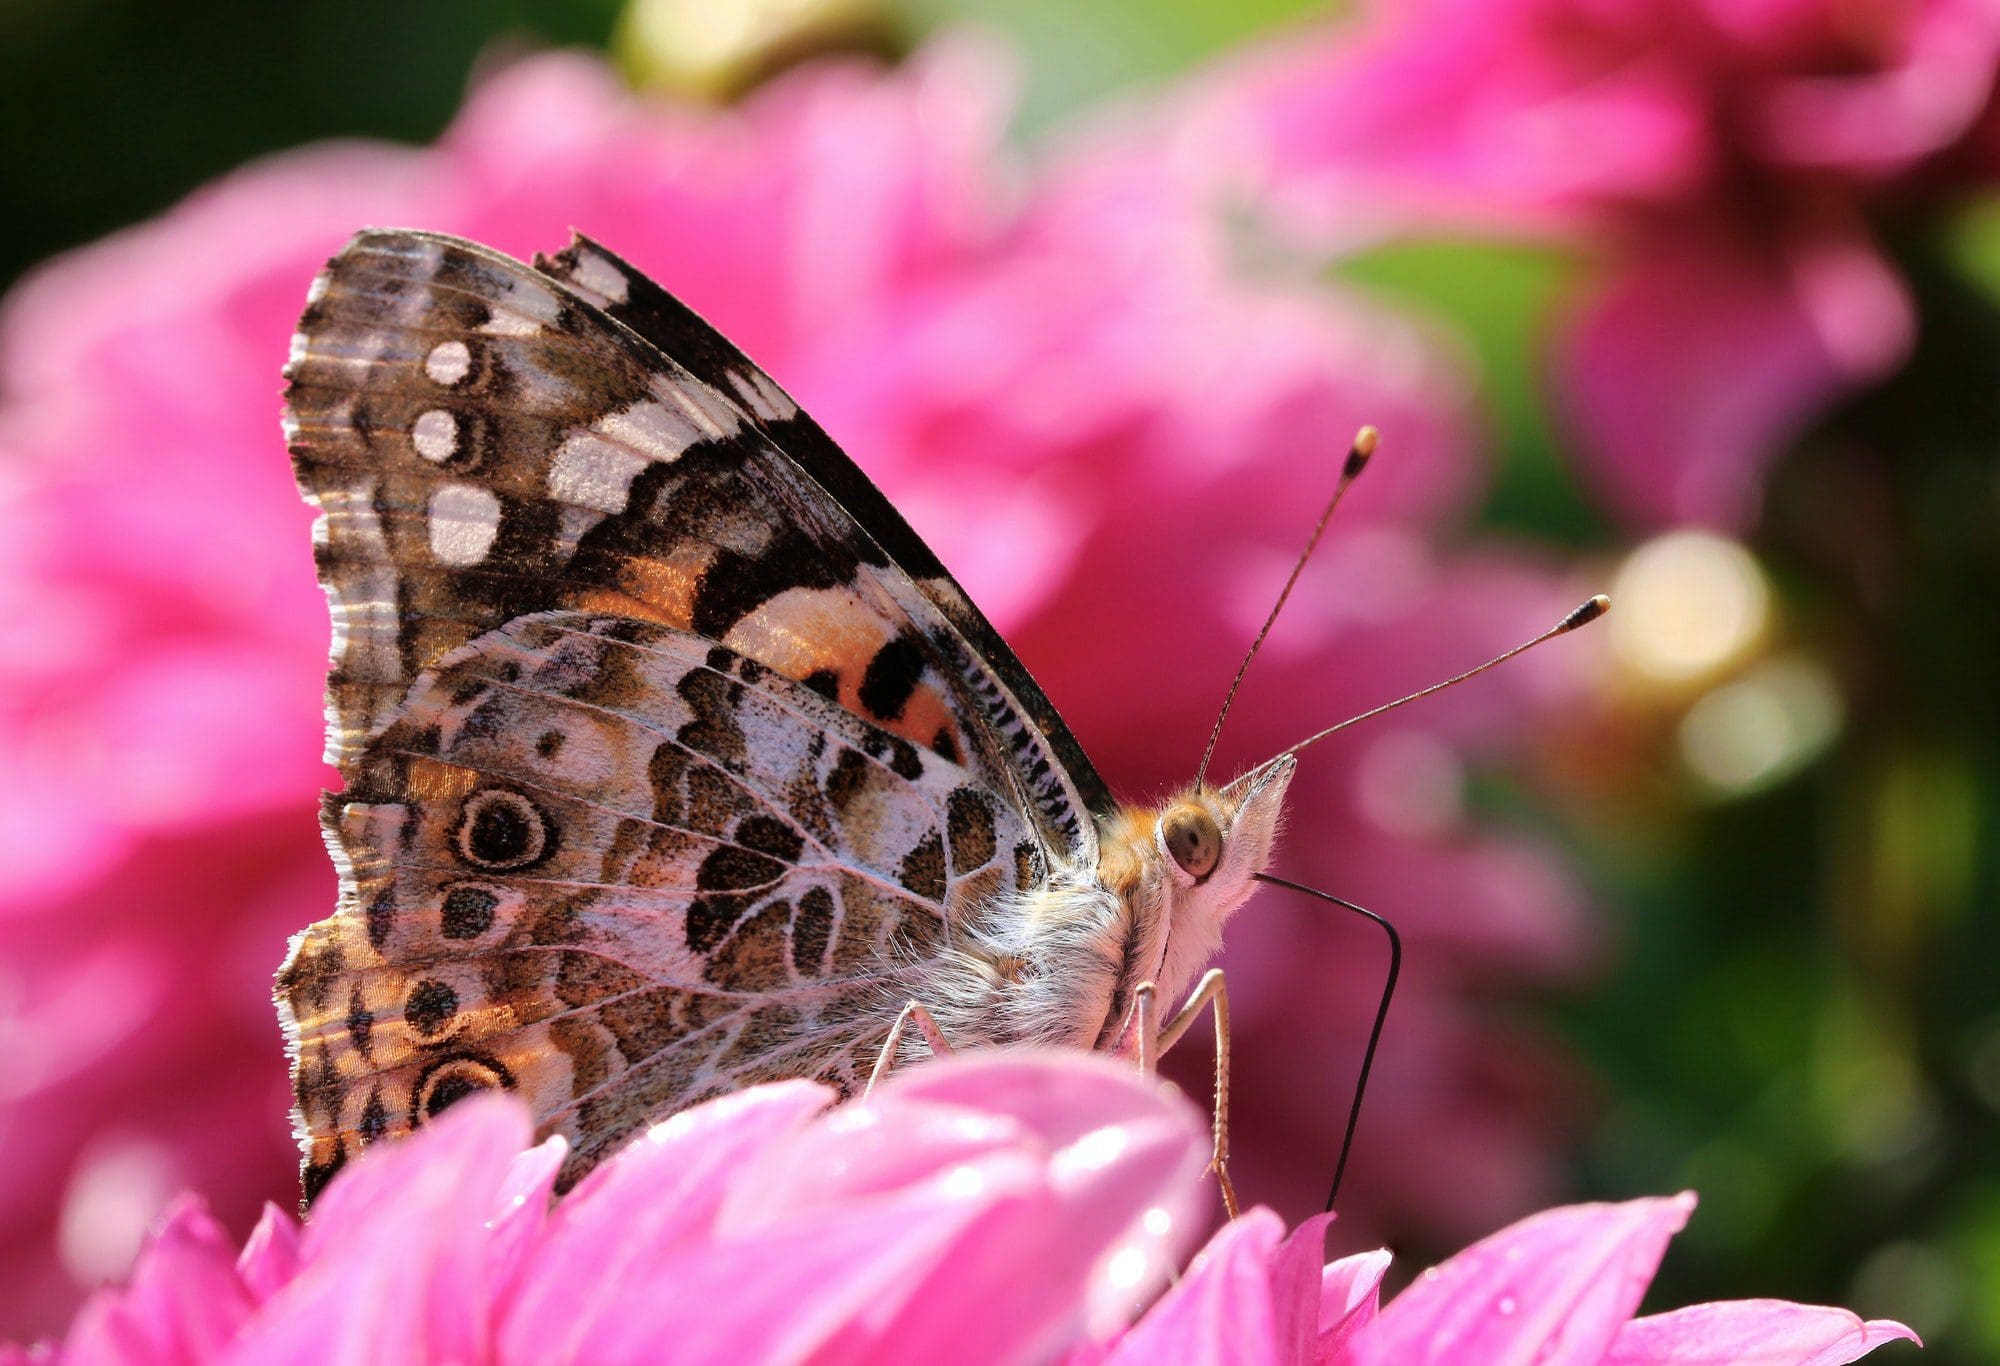
The larvae you receive, also referred to as caterpillars, are in the caterpillar stage, having hatched from an egg laid by a Painted Lady Butterfly. Painted Lady Caterpillars have 5 stages of their growth cycle, each known as instars; each instar is indicated by skin shedding. Their shed skin will appear as small black balled pieces in the cup. The final instar is when the caterpillar prepares to form a pupa. When a caterpillar generates a small red ball similar to the yellow/brown frass, it means they are ready to pupate and are done consuming their artificial diet.
During the growth stages, it’s normal to see some caterpillars that are smaller or larger than others. Caterpillars grow at different rates, even if they’re from the same group or batch. This variation in size can result from several factors, including slight differences in genetics, feeding habits, and individual metabolism. Some caterpillars may reach each instar a little faster or slower than their peers. This size difference is natural and does not usually indicate any issues with their health or development. In most cases, by the time they reach the pupal stage, the differences in size will level out, but some caterpillars may still pupate earlier or later than others. All of this is a normal part of the developmental process.
For comprehensive information about the complete life cycle and stages of the Painted Lady, please refer to our Blog Post – The Life Cycle of the Painted Lady (Thistle Butterfly). It’s not instructional but provides detailed insights into the stages of growth for Painted Lady Butterflies. Please also visit our FAQ, where you’ll find helpful information on determining the instar (growth stage) of your caterpillar based on its size and more.
B. Cleaning & Care
Every 3 days or as needed, carefully remove the lid and using the hygiene brush, delicately clean out the webbing. As the caterpillars consume their artificial diet, they will produce yellow/brown balls known as frass (caterpillar waste) as well as webbing. Both can be cleaned out using the provided hygiene brush or alternatively you can use a Q-tip. Do not fully clean out or empty the cup at any point. Leave the caterpillars undisturbed while cleaning and do not clean around the caterpillar if it is not moving, as it may be going through an instar (growth stage) and shedding its skin. Throughout each instar, you may notice black, shed skin from the caterpillar as it progresses through its growth stages. This shed skin can resemble the caterpillar itself and may get stuck on the sides of the cup, near the lid, as it is light and loose. This can also be cleaned as needed.
Please note: The food has been measured for each caterpillar and they will consume it on their own. When low, the caterpillars will be near the pupa stage. It is always best not to fully clear out the frass from the cups as in the rare event that food does run low the caterpillar may eat its own frass. Yes, it’s normal for Painted Lady caterpillars to eat their own frass. This behavior can provide additional nutrients, especially if they haven’t finished digesting all the nutrients in their food. While it might seem unusual, it’s a common behavior in many caterpillar species. We recommend placing the frass and waste in a separate closed container from the caterpillars, in case you run out of food, or it dries out, or for any other reason. In the rare event that you completely run out of food, you can then use the frass as a temporary measure to place in the cups accordingly.
C. Steps to take during growth
Approximately one week after receiving your kit or as needed throughout the caterpillar stage, please replace the paper liner if your larva has not already attached itself to the existing liner to pupate. You can use a paper towel to replace the paper liner. Cut a clean piece of paper towel and place it on top of the container so it covers the lid of the container. When the cup’s lid is closed, the paper towel should hang from each side and should press firmly against the cup lid and sides, not sit loosely. This new liner will prevent larvae from falling off the liner when pupation begins. If you notice the liner becoming wet from condensation or tears in the liner – replace it right away with a fresh paper towel.
If you start to see any condensation or water vapors on the inside of your cup, please open the top to clear the condensation. Throughout this period, it is crucial to stay close to the cup, allowing the condensation to dissipate and ensuring the caterpillars stay inside the cup without any chance of escaping. If the paper liner becomes ripped, is missing, or has disintegrated, there’s no need for concern—it will not harm your caterpillars. The liner is primarily there to absorb moisture and will naturally break down over time, so it can be replaced as needed. It also makes it easier to transfer the pupae to the net cage for hatching when the caterpillar forms its pupa on the paper liner. In some cases you may notice that the caterpillar takes a nibble of the paper liner, this is not common but can happen from time to time but is not a sign of concern.
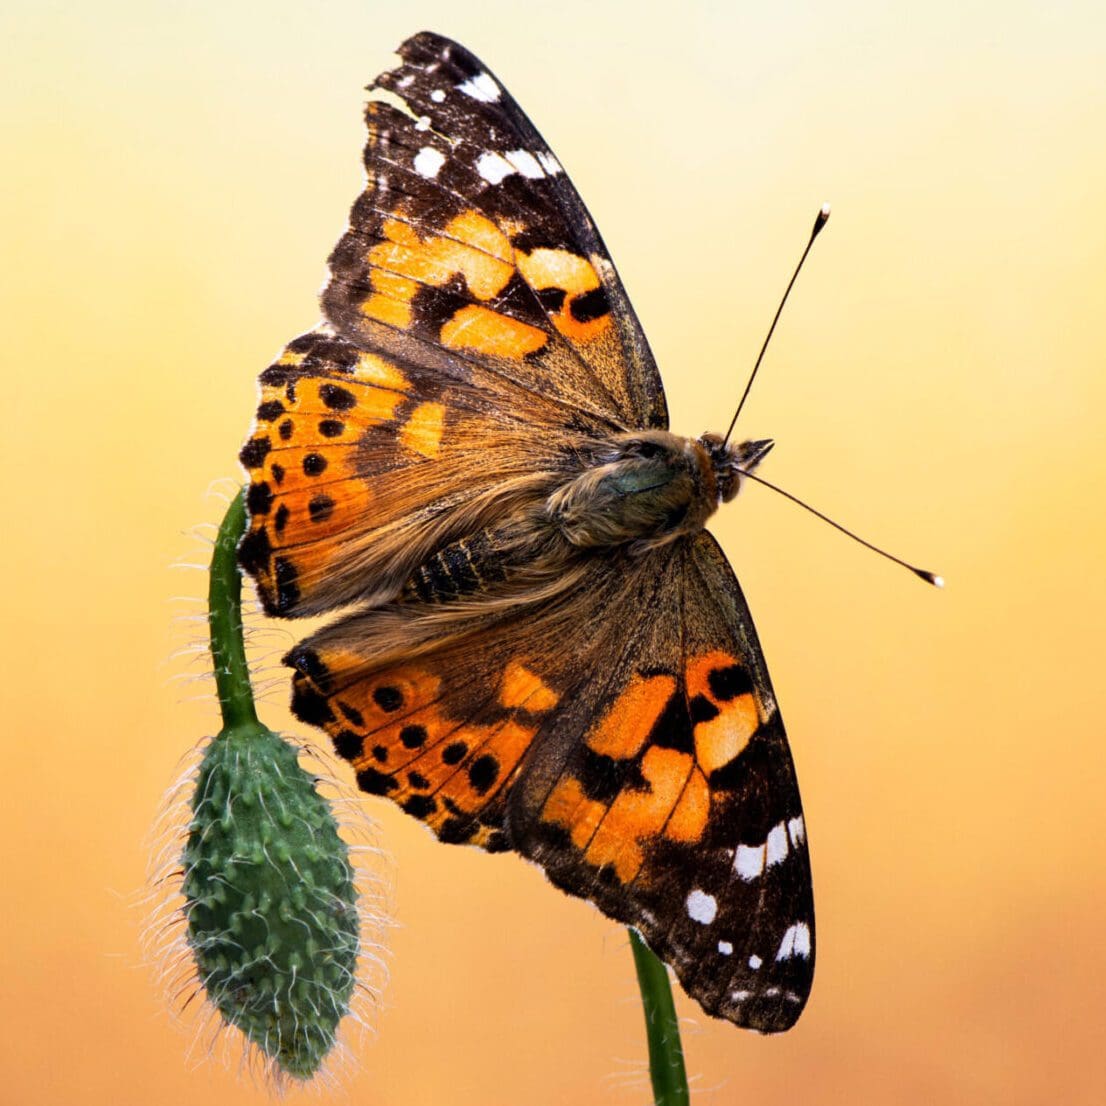
A. What to expect during pupation
The Chrysalis stage, also known as the pupa stage is most commonly confused with the term cocoon. Cocoon is the term used for moths, butterflies make pupas. It is perfectly normal for the caterpillars to develop into pupae at different times. The caterpillar undergoes a process where it sheds its skin, revealing the pupa, a transformation that can occur within a few brief minutes. You will observe the caterpillar making its way to the upper part of the container, clinging to the lid. It will then suspend itself in a J-shaped form before shedding its last layer of skin, unveiling the pupa.
B. What to do during pupation
During the pupation stage the insect should not be disturbed in any way and should remain still in its cup for this delicate process. It will go through the process by itself, without any outside help. It is perfectly normal for the caterpillars to develop into pupae at different times.
For those who have purchased either a Small Net Cage or a Large Net Cage, please refer to the instructions below for guidance on setting it up.
If there are any rubber bands securing your net cage, gently take them off. Next, unwrap the plastic packaging. Pull the net cage out of its packaging, extending it from one end to the other, and place it on a flat surface.
Unzip the net cage, and place a paper towel on the bottom to protect it from the natural excrement that occurs in the hatching stage. Note that the clear plastic side is for viewing, and the bottom can be any side, as long as you can reach the zipper.
The paper liner in your cups is in place for the caterpillar to pupate and to hang from using webs they create. 24-48 hours after the caterpillar pupates and hardens, carefully remove the lid of the cup; the caterpillar should be attached to the paper liner. Then, remove the paper liner and tape it to the roof of the net cage, suspending the pupa for hatching; they do not need to all be moved at the same time. Be careful while handling the pupa during this stage.
You may notice that some caterpillars pupate earlier than others on the paper liner. As needed, transfer those on the paper liner to the net cage, and simply add a new paper liner in the cup for the remaining caterpillars until they’re ready to be moved as well.
There may be a possibility that the pupa forms directly on the lid on the floor of the cup, or elsewhere which is fine. In this case, the pupa can be transferred and placed at the bottom corner of the net cage. Once the pupa is placed in the bottom corner of the net cage, once the butterfly emerges it will climb up the sides of the cage to dry its wings.
Temperature dependent, the pupa generally hatches in 7-12 days. The pupa requires no assistance during this process.
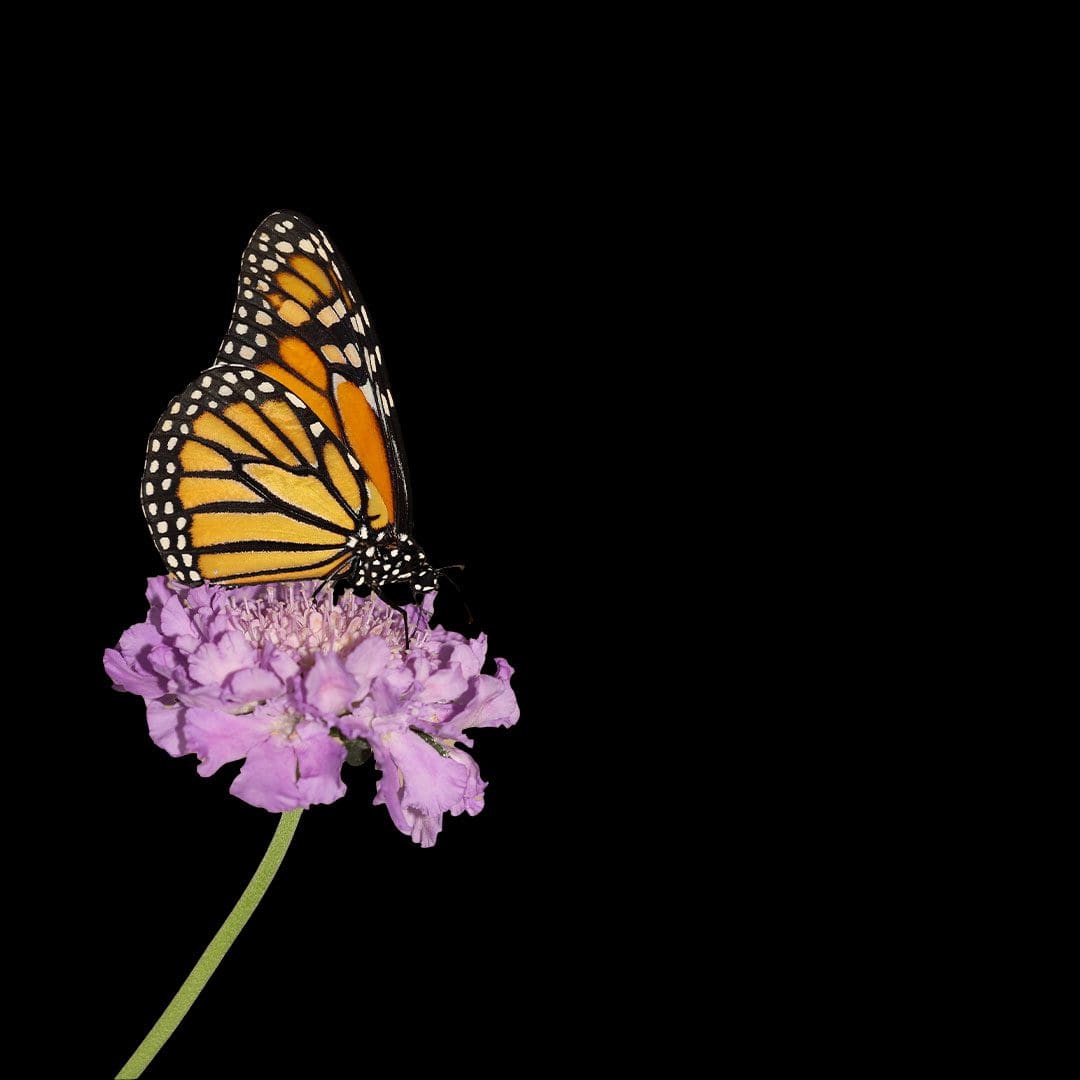
Upon emerging, butterflies release a red liquid known as meconium. Rest assured, it is not blood but rather surplus fluid that is not essential to fill the wings and is therefore expelled from the butterflies abdomen. This meconium is stored in the intestine of the butterfly and is expelled after the butterfly emerges. This expulsion usually takes a few minutes, and once completed, any access excretion will drop to the bottom of the cage. When the butterfly emerges, it uses the side of the net cage as a ladder and climbs up to spread its wings and dry. By placing a paper towel at the bottom of the net cage which is helpful, as it will catch the meconium and prevent staining on the surface below. Be sure to line the bottom of the net cage in a way that protects the surface beneath it from any stains.
If you plan to release your butterflies within 48 hours of emergence, generally they do not required to be fed as the proboscis (feeding tube) has not yet developed. The proboscis is like a long straw that butterflies use to drink nectar from flowers. It’s a tube that unfolds from their mouth when they land on a flower, helping them eat. Although the proboscis is still developing and the butterfly may not be able to feed immediately, we recommend always providing a food source in case they choose to feed.
If you plan to release the butterflies more than 48 hours after emergence, they hatch at different times or show interest in food, you can feed them within their net cage.
The butterflies can be fed:
Whichever form of nectar you choose, make sure to change nectar daily as it will ferment. On our website you will find a Blog Post How to Feed Your Butterflies – A Simple Guide for further information on feeding the butterflies including using organic flowers and fruits.
Choose a calm and sunny day for the release, as butterflies are more active in warm weather. Select a location with plenty of flowers, as butterflies are attracted to nectar. Release butterflies 1 hour after sunrise and at least 1 hour before sunset.
Gently unzip the net cage. Allow the butterflies some time to acclimate to their surroundings. They may take a moment to flutter around, orient themselves, and gather their strength before taking flight. Refrain from handling the butterflies directly. While butterflies are delicate, the oils and substances on our skin can be harmful to them.
Similar to how you may have noticed your caterpillars varied in size, pupated at different times, and hatched at different times, this is also normal when it comes to releasing your butterflies. In the wild, painted lady butterflies have a short lifespan of approximately two weeks. This lifespan is shortened if they remain in the net cages after hatching. We encourage you to release the butterflies within 1-3 days of hatching, weather permitting.
Release the butterflies that are ready as needed, and wait for the others to hatch or become ready to be released. We recommend releasing butterflies as they are ready, rather than waiting for all of them to hatch and releasing them at the same time.
A. What can go wrong & what to do
In the wild, for every 100 butterfly eggs laid, only 1 reaches the butterfly stage. It is through our experience and following the instructions that are provided you will have a high success rate reaching the butterfly stage. Despite the high success rate, we acknowledge that not all butterflies will emerge in perfect form, and may have developmental issues including deformities and in rare occasions, death may occur. This happens commonly in the wild, however, it is not common to see when raised in an enclosure. To understand natural issues that may occur such as insect perishing, deformities, and related topics, we encourage you to look into this blog post – Embracing Imperfection: Life Lessons from Butterflies, offering valuable insights and information.
If your butterfly has deformed wings and is unable to fly, you can still provide a safe and comfortable environment within your net cage. Line the bottom with paper towels or a soft material to cushion it. Since it may not be able to reach food on its own, offer a sugar water solution (1 part sugar or honey to 9 parts water) using a soaked cotton ball or sponge, or place slices of fresh fruit such as orange or watermelon inside the cage. Gently place the food in front of the butterfly’s face so it can access it with its proboscis—please repeat this feeding process two to three times daily. While its lifespan may be shorter than the typical two weeks of a Painted Lady butterfly, your care can help keep it comfortable and nourished.
It’s important to understand that even in the wild, not every butterfly reaches adulthood in perfect condition. In fact, out of every 100 eggs laid, only about one typically survives to become a butterfly. This reminds us just how delicate and miraculous the butterfly life cycle truly is. The care and compassion you show by helping a butterfly with deformed wings is incredibly meaningful—offering comfort to a living creature that might not have survived otherwise. Thank you for your kindness and for taking the time to care for butterflies—it truly makes a difference. If you encounter any further concerns, please contact our team at info@monarchbutterflies.ca with a description and photos or videos so we can best assist you.
Throughout the raising process you are able to access information on our website on our FAQ and Blog page for more insightful information on what to do. In the event you are unable to find your answer simply email our team at info@monarchbutterflies.ca. Please always keep all original contents, packaging, boxes, materials, insects, and even perished insects. Without images of these items, our specialists may not be able to accurately determine what went wrong. Having everything on hand allows our specialists to fully review your concerns and request or require images for a better understanding. In some cases, a presumed perished insect may simply be in a resting stage during an instar and not moving for a period of time, which could be mistaken for being dead. Similarly, shed skin from an instar may appear like a perished insect. By keeping all of the contents available and if our specialist require images or as needed, you help us better understand the situation and provide the best possible assistance.
B. Claims Form
In case your package arrives damaged, with missing items or has other issues, you can file a claim regarding your order for our team to review, please do so by clicking here. You can also find a link to the claims form on our website, www.monarchbutterflies.ca/claims. You will find multiple options for the reason for filing a claim. Please select the one that best applies to your situation, and if necessary, file separate claims for additional issues. For example, file one claim for damaged packaging and another for perished insects. This ensures that each claim is handled by the appropriate department and processed accordingly.
When submitting a claim, please be sure to include clear images and detailed descriptions, as well as a single clear image of each affected insect. This will help our specialists better understand your concerns and allow for a thorough review, as the solution for each insect may vary. Providing images from all angles of the cup, as outlined on the claims page, will also support a comprehensive review. A detailed submission, following the requirements on the claims page, will enable our specialists to respond to you as quickly as possible, without needing to request additional information. We deeply apologize for any inconvenience you may experience and truly appreciate your understanding and patience. We recognize how delicate the life cycle of the Painted Lady butterfly is at every stage, and we are truly sorry for any issues you may face—whether it’s due to human error, package handling, damaged contents, perished insects, or any other concerns. Please know that we are committed to providing you with the best possible experience, one that is both enjoyable and educational, as shared in our blog post above. Thank you for your time, understanding, and continued support. To learn more about our claims process/requirements and more simply visit the claims page for more details.
Thank you for tending to these beautiful butterflies with care. We hope that you had a wonderful experience raising, hatching and releasing these beautiful butterflies. Your nurturing efforts contribute to their crucial role in pollination and the overall health of our ecosystem.
If you have any questions or concerns feel free to reach out via email at info@monarchbutterflies.ca, and our team members will be delighted to assist you.
MonarchButterflies.ca is an evolving platform undergoing constant updates. If you have any suggestions or edits you would like to share with our team, please don’t hesitate to reach out to info@monarchbutterflies.ca to share your suggestions. We want to make this process as easy and informative as possible. Thank you 🦋


10 Responses
I am thinking of ordering painted lady kit. What is the shipping cost from your location to Scarborough, ON.
I run a home childcare program.
I have a set up terrium for butterfly use only.
Dear Maureen,
Thank you for reaching out to our team!
For exact shipping rates, which vary based on quantity and location, please visit our online store.
Please add the desired items to your cart and go to the check out page. Prior to submitting payment for an order, you are able to see the exact shipping costs.
Please let us know if you have any further questions, we look forward to sharing the joy of butterflies this season!
I just wanted to share my experience with this set of instructions and video. They were by far the most detailed I’ve found when it comes to growing and hatching Painted Ladies. We tried this for the second time, but with a different company previously that offered a similar service. Unfortunately, their instructions weren’t as thorough, which led to a lot of confusion. In comparison these instructions were incredibly detailed and well-organized. I really appreciated being able to go through each section and video whenever I needed a refresher. Huge thanks for making the process so much easier!
We purchased the net cage for our pupa. Can you advise if the plastic side is supposed to be on top or on the bottom? Or does it matter? Also some of our caterpillars have eaten through the paper towel and attached themselves to the lids. Do you recommend taking them off of the lid or simply taping the lid to the top of the net cage? Thank you!
Dear Agapi,
Thank you for your questions. Please email our team at info@monarchbutterflies.ca for prompt responses.
The plastic side can be used as a base or placed in a way your able to view the insects hatching as a viewing window. If the insects pupate on the cup lid you are able to pin the cup lid in the net cage or tape it if necessary
In the event the caterpillars eat the paper liner simply replace it with a new one.
This is do detailed. Thank you!
Hello,
Thanks for all the info! Very detailed compared to other providers.
Is it necessary to mist the pupas a few times a day?
Thanks!
No, it’s not necessary to mist the pupae daily. Only mist lightly if the air is very dry; otherwise, it can cause mold or harm.
wondering about best recommended ages to gift this kit…..
Our butterfly kits are a wonderful gift for a wide range of ages. They are most popular for children ages 4 and up, with adult supervision recommended for younger children. The kits offer a fun and educational experience for kids, classrooms, and even adults who enjoy nature and science.
If you have any questions about which kit might be best, feel free to let us know!